PlanetMaker User Guide
Get to know PlanetMaker and get the most out of it to make the perfect planets
Overview
Quickly get started using PlanetMaker
Requirements
PlanetMaker is a graphics intensive application which makes use of the latest WebGL technology available in some modern browsers. It requires the use of the latest versions of either Google Chrome or Mozilla Firefox (though it has been reported to work in Safari) and have accelerated graphics capabilities.Interface
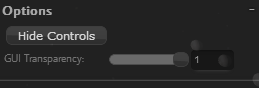
Hide Controls
Allows for hiding of the on-screen control elements along with the page title and other items. A link will appear in the top right labels 'Show Controls' which will redisplay the hidden controls.GUI Transparency
Adjust the transparency of the control elements for increases visibility of the scene.Navigation
PlanetMaker uses mouse and keyboard based navigation controls, similar to those in Google Earth.
Rotating
Rotate the scene by left-clicking and dragging with the mousePitch/Roll
Control the pitch & roll of the scene by holding down shift while left-clicking and dragging with the mouse.Panning
Pan the scene (offsetting the planet from the center, similar to turning your head away from the object of focus) by holding down Ctrl while left-clicking and dragging with the mouse.Zooming
Zoom either with the scroll-wheel or by right-clicking and dragging the mouse up or down.Scene
Scene options control general effects such as source image resolutions, lighting, and shadows.
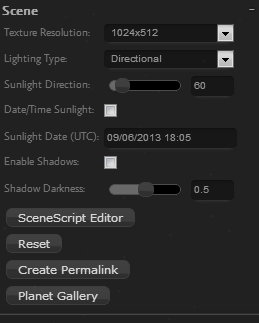
Texture Resolution
Controls the resolution (detail level) of the source images. Higher values mean enhanced detail, but are subject to memory and GPU limits.Lighting Type
Switch between directional and point lighting. Directional simulates a planet which receives most of it's light from a local star. Point lighting makes the light emit from the planet itself.Sunlight Direction
The direction from which "directional" light will flow, in degrees.Date/Time Sunlight
Automatically determine sunlight direction using the "Sunlight Date" option.Sunlight Date (UTC)
Date to use when determining sunlight direction if "Date/Time Sunlight" option is checked, based on Coordinated Universal Time (UTC). This is an approximation, true sunlight azimuth & declination may differ some.Enable Shadows
Enable shadows on objects.Shadow Darkness
Darkness of shadows on objects (amount of blocked sunlight).SceneScript Editor
Open the SceneScript editor dialog.Reset
Reload the page and set the model back to it's original state.Planet Gallery
View a list of example planets.Surface
Surface options control the planet itself and its physical properties.
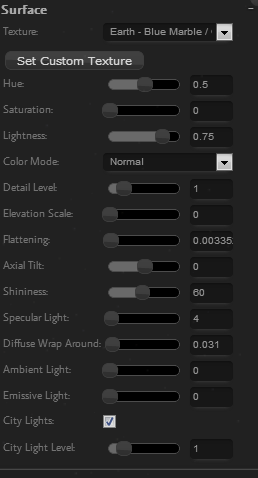
Texture
Select the base texture for the planet surface.Set Custom Texture
Open the Custom Texture dialog.Hue/Saturation/Lightness
Modify the surface color by applying HSL adjustments. By default, the saturation is at the minimum so no color shading is applied.Color Mode
Invert and/or force greyscale color transformations on the surface image.Detail Level
Adjust the level of detail with which surface features are shaded using normal mapping.Elevation Scale
Adjust the scale with which elevations are derived from the height map.Flattening
Adjust the level of planetary flattening.Axial Tilt
Adjust the axial tilt of the planet, in degrees.Shininess
Adjust the shininess of the surface. Higher values result in a more focused reflection. The minimum value of 0 results in a uniform, matte, distribution of light.Specular Light
The intensity of light that contributes to the shininess of the surface.Diffuse Wrap Around
Degree of diffuse (normal) lighting which is visible on surfaces facing away from the light source.Ambient Light
Intensity of scattered, non-directional light present in the surface.Emissive Light
Intensity of light being emitted by the planet.City Lights
Enable the visibility of city lights in low-light portions of the planet.City Light Level
Intensity of visibility of city lights.Clouds
Clouds options control the clouds and their physical properties such as texture, thickness, altitude, and coloring.
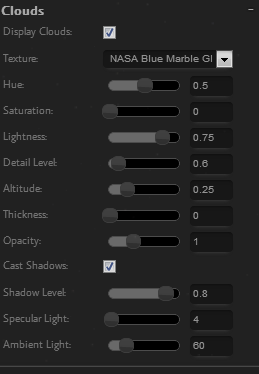
Display Clouds
Enable or disable the display of the cloud layer.Texture
Select the base texture for the planets clouds.Hue/Saturation/Lightness
Modify the cloud color by applying HSL adjustments. By default, the saturation is at the minimum so no color shading is applied.Detail Level
Adjust the level of detail with which surface features are shaded using normal mapping.Altitude
Adjust the altitude above the surface in which the clouds reside (Cloud base/Ceiling).Thickness
Adjust the scale with which elevations are derived from the height map.Opacity
Adjust the opacity, or transparency, of the cloud layer.Cast Shadows
Enable or disable cloud shadows on the surface.Shadow Level
Adjust the amount of light blocked by the clouds in the surface shadows.Specular Light
The intensity of light that contributes to the shininess of the clouds.Ambient Light
Intensity of scattered, non-directional light present in the clouds.Local Star
A star, local to your planet, which is the source of light.
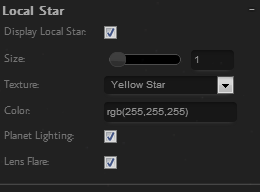
Display Local Star
Enable or disable the visibility of the local star. When enabled, the camera must be pointed towards the light source for the star to be visible.Size
Adjust the size of the local star.Texture
Select the image used to represent the local star.Color
Adjust the color emitted by the star.Planet Lighting
Toggle whether the color of the light reaching the planet is affected by that of the local star.Lens Flare
Enable or disable lens flare when the local star is in view.Atmosphere
Control the altitude, density and color of the planet's atmosphere
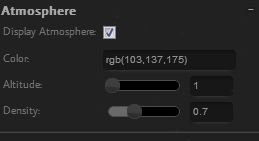
Display Atmosphere
Toggle the visibility of the planets atmosphere.Color
Adjust the color of the atmosphere.Altitude
Adjust the high (altitude) of the atmospheric halo.Density
Adjusts the density of the atmosphere as it approaches the horizon.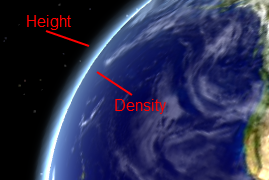
Rings
Display and adjust the appearance, size, and coloring of a planetary ring system
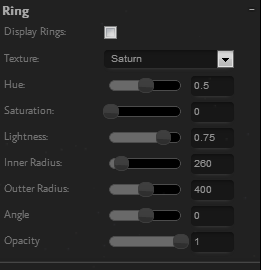
Display Rings
Toggle the visibility of a planetary ring system.Hue/Saturation/Lightness
Modify the ring color by applying HSL adjustments. By default, the saturation is at the minimum so no color shading is applied.Inner Radius
Adjust the inner radius of the ring system.Outter Radius
Adjust the outter radius of the ring system. This must be greater than the inner radius for the rings to be visible.Angle
Adjust the angle, or inclination, in degrees that the rings move alongOpacity
Adjust the opacity, or transparency, of the ring layer.Background
Change and customize the background
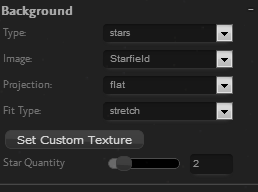
Type
Switch between background types. The default is "Stars" which provides a simulated stellar neighborhood with a configurable density. "Image" allows for the use of image textures as backgrounds.Image
Select the image texture to use as the background when the type is set to "Image".Projection
Toggle the image background projection between a static flat display and a wrapped "spherical" projection.Fit Type
Adjusts how a flat background image is fit to the scene.Set Custom Texture
Open the Custom Texture dialog.Star Quantity
Adjust the amount of stars visible in the background when the type is set to "Stars".Moons
Add moons and control their physical properties and locations

Adding a Moon
Create Moon
Adds a moon to the scene and creates a configuration box.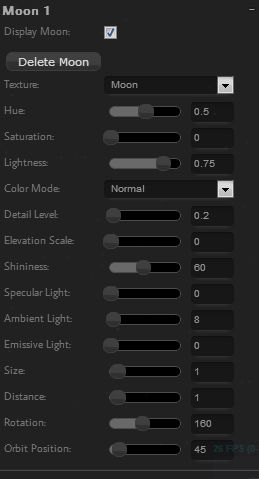
Adjusting Moon
Display Moon
Toggle the visibility of the moon object.Delete Moon
Deletes the moon from the scene.Texture
Select the base texture for the moon surface.Hue/Saturation/Lightness
Modify the surface color by applying HSL adjustments. By default, the saturation is at the minimum so no color shading is applied.Color Mode
Invert and/or force greyscale color transformations on the surface image.Detail Level
Adjust the level of detail with which surface features are shaded using normal mapping.Elevation Scale
Adjust the scale with which elevations are derived from the height map.Shininess
Adjust the shininess of the surface. Higher values result in a more focused reflection. The minimum value of 0 results in a uniform, matte, distribution of light.Specular Light
The intensity of light that contributes to the shininess of the surface.Ambient Light
Intensity of scattered, non-directional light present in the surface.Emissive Light
Intensity of light being emitted by the planet.Size
Adjust the size of the moonDistance
Adjust the distance of the moon from the center of the planet (semimajor axis)Rotation
The rotation of the moon relative to the planet, in degrees.Orbit Position
The angular position of the moon in it's orbit (true anomaly). Currently, moons are positioned along a purely circular orbit.Effects
Apply and customize dynamic effects
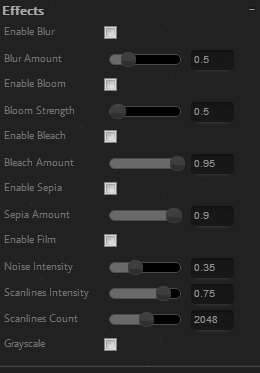
Enable Blur
todoBlur Amount
todoEnable Bloom
todoBloom Strength
todoEnable Bleach
todoBleach Amount
todoEnable Sepia
todoSepia Amount
todoEnable Film
todoNoise Intensity
todoScanlines Intensity
todoScanlines Count
todoGrayscale
todoCustom Textures
Upload and apply your own custom texture images
Textures for use as a planet surface are recommended to be 2x1 (equirectangular) aspect ratio such as 1024x512, 2048x1024, or 4096x2048. Note that the size may be limited by your system and browser memory and graphics capabilities.
todoScene Script
SceneScript provides a basic API for creating deep customizations to the PlanetMaker scene. Also exposed are the PlanetMaker internals, Three.js, and jQuery APIs.
Script Data Objects
planet
This is the primary PlanetMaker engine which provides access into the internals of the application.config
The primary configuration map used by PlanetMaker.context
A map of application data including configurations and scene objects.- camera : THREE.PerspectiveCamera
- primaryScene : THREE.Scene
- secondaryScene : THREE.Scene
- renderer : THREE.WebGLRenderer
- controls : KMG.ExamineControls
- objects : Array<KMG.BaseObject>
- configChanged : boolean
- moons : Array<KMG.MoonObject>
- script : KMG.SceneScript
- lights.ambient : THREE.AmbientLight
- lights.primaryDirectional : THREE.DirectionalLight
- lights.primaryPoint : THREE.PointLight
- lights.secondaryDirectional : THREE.DirectionalLight
- lights.secondaryPoint : THREE.PointLight
Script Callbacks
onFrame(planet, config, context)
Called prior to the scene object update routine which is invoked before each frame is rendered- planet: The primary PlanetMaker scene container
- config: Scene configuration
- context: THREE.js and environmental context objects
- returns: True if changes are made to the scene objects that will need to be addressed by their internal update methods.
Template:
function onFrame(planet, config, context) {
	return false;
}
onRender(planet, config, context)
Called prior the the scene being rendered to the screen.- planet: The primary PlanetMaker scene container
- config: Scene configuration
- context: THREE.js and environmental context objects
Template:
function onRender(planet, config, context) {

}
onScriptInitialize(planet, config, context)
Called within renderer the first time it encounters this script instance to allow in-context initialization.- planet: The primary PlanetMaker scene container
- config: Scene configuration
- context: THREE.js and environmental context objects
- returns: True if changes are made to the scene objects that will need to be addressed by their internal update methods.
Template:
function onScriptInitialize(planet, config, context) {
	return false;
}
onScriptDestroy(planet, config, context)
Called within renderer if/when the script instance is replaced by a new version (such as when 'Apply Changes' is clicked). Allows for clean-up of any resources which may be specific to the script instance.- planet: The primary PlanetMaker scene container
- config: Scene configuration
- context: THREE.js and environmental context objects
- returns: True if changes are made to the scene objects that will need to be addressed by their internal update methods.
Template:
function onScriptDestroy(planet, config, context) {
	return false;
}
Methods
radians( degrees ) : number
Converts degrees to radians. Shortcut fordegrees * (Math.PI / 180).
degrees( radians ) : number
Converts radians to degrees. Shortcut forradians * (180 / Math.PI).
rotatePlanet( rotationInDegrees )
Sets the rotation of the planet in degrees. This is an absolute rotation and not incremental to the previous rotation.rotateScene( rotationInDegrees )
Sets the rotation of the scene in degrees. This is an absolute rotation and not incremental to the previous rotation.rotateMoon( moonIndex, rotationInDegrees )
Sets the rotation of the moon at 'moonIndex' in degrees. This is an absolute rotation and not incremental to the previous rotation.rotateMoons( rotationInDegrees|Array )
Sets the rotation of all moons in degrees. The parameter can be either numerical, which is applied to all moons, or an array with a rotation value for each moon.Using a Single Rotation Value:
rotateMoons(90); // Sets rotation of all moons to 90°
Using an Array With Rotation Values:
rotateMoons([45, 90, 135]); // Applies rotations to first three moons in scene
advanceMoonOrbit( moonIndex, rotationInDegrees )
Advances the moons orbital position in degrees. This value is incremental to the last call and positive values will move the moon counter-clockwise as viewed from above.advanceMoonOrbits( rotationInDegrees|Array )
Advances all moons orbital positions in degrees. This value is incremental to the last call and positive values will move the moon counter-clockwise as viewed from above. The parameter can be either numerical, which is applied to all moons, or an array with a rotation value for each moon.Using a Single Rotation Value:
advanceMoonOrbits(90); // Sets orbit movement of all moons to 90°
Using an Array With Rotation Values:
advanceMoonOrbits([45, 90, 135]); // Applies orbit movement to first three moons in scene
addToPrimaryScene( object )
Adds aKMG.BaseObject derived object to the primary (foreground) scene.
Example:
var belt = new KMG.BasicAsteroidBeltObject(context, {
	innerRadius : 260,
	outterRadius : 400
});
addToPrimaryScene(belt);
addToSecondaryScene( object )
Adds aKMG.BaseObject derived object to the secondary (background) scene.
Examples
Create Several Moons:
function onScriptInitialize(planet, config, context) {
	planet.addMoon({moonDistance : 1.0, moonScale : 0.25});
	planet.addMoon({moonDistance : 1.5, moonScale : 0.25});
	planet.addMoon({moonDistance : 2.0, moonScale : 0.25});
	planet.addMoon({moonDistance : 2.5, moonScale : 0.25});
	planet.addMoon({moonDistance : 3.0, moonScale : 0.25});
	planet.addMoon({moonDistance : 3.5, moonScale : 0.25});

	return true;
}
Adding an Asteroid Belt:
function onScriptInitialize(planet, config, context) {
	var belt = new KMG.BasicAsteroidBeltObject(context, {
		innerRadius : 260,
		outterRadius : 400
	});
	addToPrimaryScene(belt);
	return true;
}
Adding a Moon with an Asteroid Belt:
function onScriptInitialize(planet, config, context) {
	var moon = planet.addMoon({moonDistance : 1.0, moonScale : 0.25});

	var belt = new KMG.BasicAsteroidBeltObject(context, {
		innerRadius : 100,
		outterRadius : 160,
		targetObject : moon.object
	});
	addToPrimaryScene(belt);
	return true;
}
Add a Rotator to the Planet:
function onScriptInitialize(planet, config, context) {
	var rotator = new KMG.ObjectRotator(context,
										[context.surfaceObject, context.cloudObject],
										1.0 // Rotation speed, degrees per tick
										);
	rotator.start();
	return true;
}
Adding a Rotating Moon:
function onScriptInitialize(planet, config, context) {
	var moon = planet.addMoon({moonDistance : 1.0, moonScale : 1.0});
	var rotator = new KMG.ObjectRotator(context,
										moon.object, // Object being rotated
										1.0 		 // Rotation speed, degrees per tick
										);
	rotator.start();
	return true;
}
Adding an Orbiting Moon:
function onScriptInitialize(planet, config, context) {
	var moon = planet.addMoon({moonScale : 1.0});
	var orbiter = new KMG.BasicOrbiter(context,
										moon.object, // Object doing the orbiting
										1.0,         // Orbit distance (semimajor axis)
										1.0          // Orbit speed
										);
	return true;
}
Stacking Animators - Rotating and Orbiting Moon:
function onScriptInitialize(planet, config, context) {
	var moon = planet.addMoon({moonScale : 1.0});
	var rotator = new KMG.ObjectRotator(context,
										moon.object, // Object being rotated
										1.0 		 // Rotation speed, degrees per tick
										);
	rotator.start();
	var orbiter = new KMG.BasicOrbiter(context,
										moon.object, // Object doing the orbiting
										1.0,         // Orbit distance (semimajor axis)
										1.0          // Orbit speed
										);
	return true;
}
Add Moon With Basic Orbit Line:
function onScriptInitialize(planet, config, context) {
	var moon = planet.addMoon({moonScale : 1.0, moonDistance : 1.0});
	var orbit = new KMG.BasicOrbitPathLine(context, {distance : 1.0});
	addToPrimaryScene(orbit);
	return true;
}
Add a moon on Pluto's Orbit:
function onScriptInitialize(planet, config, context) {
	var moon = planet.addMoon({moonScale : 1.0});
	var orbiter = new KMG.EllipticalOrbiter(context,
											moon.object,
											30.0,                       // Orbit multiplier (scale)
											1.0,                       // Orbit speed
											KMG.OrbitDefinitions.pluto // Orbital properties
											);

	var orbitConfig = KMG.Util.clone(KMG.OrbitDefinitions.pluto);
	orbitConfig.scale = 30;
	orbitConfig.segments = 256;

	addToPrimaryScene(new KMG.OrbitPathLine(context, orbitConfig));
	return true;
}
Solar System Animation:

function onScriptInitialize(engine, config, context) {

	config.lightingType = "Point";
	config.lensFlareEnabled = false;
	config.displayLocalStar = false;

	config.displayClouds = false;
	config.displayAtmosphere = false;
	config.scaleSurface = .02;
	config.texture = "Sun";
	config.ambientIntensity = 255.0;
	config.emissiveIntensity = 255.0;
	config.enableCityLights = false;
	config.shininess = 0;
	config.flattening = 0;

	var sunRotator = new KMG.ObjectRotator(engine.context, engine.context.surfaceObject, 3.0);
	sunRotator.start();
	var tex = {
		name : "",
		texture : "",
		bumpMap : "",
		normalMap : "",
		specularMap : "",
		enabled : true
	};

	KMG.textures.push(KMG.Util.extend({ name : "mercury", texture : "/img/planets_small/mercury.jpg"}, tex));
	KMG.textures.push(KMG.Util.extend({ name : "venus", texture : "/img/planets_small/venus.jpg"}, tex));
	KMG.textures.push(KMG.Util.extend({ name : "earth", texture : "/img/planets_small/earth.jpg"}, tex));
	KMG.textures.push(KMG.Util.extend({ name : "mars", texture : "/img/planets_small/mars.jpg"}, tex));
	KMG.textures.push(KMG.Util.extend({ name : "jupiter", texture : "/img/planets_small/jupiter.jpg"}, tex));
	KMG.textures.push(KMG.Util.extend({ name : "saturn", texture : "/img/planets_small/saturn.jpg"}, tex));
	KMG.textures.push(KMG.Util.extend({ name : "uranus", texture : "/img/planets_small/uranus.jpg"}, tex));
	KMG.textures.push(KMG.Util.extend({ name : "neptune", texture : "/img/planets_small/neptune.jpg"}, tex));
	KMG.textures.push(KMG.Util.extend({ name : "pluto", texture : "/img/planets_small/pluto.jpg"}, tex));

	function addOrbitingPlanet(orbitConfig, objectScale, texName, showRing) {
		var scale = 35;
		var planetConfig = KMG.Util.clone(orbitConfig);
		planetConfig.scale = scale;
		planetConfig.segments = 256;
		planetConfig.opacity = 0.4;
		addToPrimaryScene(new KMG.OrbitPathLine(engine.context, planetConfig));

		var planet = engine.addMoon({moonScale : objectScale, moonTexture : texName});
		var orbiter = new KMG.EllipticalOrbiter(engine.context, planet.object, scale, 10000000.0, planetConfig);
		var rotator = new KMG.ObjectRotator(engine.context, planet.object, 3.0);
		rotator.start();
		if (showRing) {
			var ring = new KMG.RingObject(context, {
				ringInnerRadius : 90 * objectScale,
				ringOutterRadius : 130 * objectScale,
				targetObject : planet.object,
				displayRing : true
			});
			addToPrimaryScene(ring);
			var orbiter = new KMG.EllipticalOrbiter(engine.context, ring, scale, 10000000.0, planetConfig);
		}
	}

	var planetScale = .05;
	addOrbitingPlanet(KMG.OrbitDefinitions.mercury, planetScale * .2, "mercury");
	addOrbitingPlanet(KMG.OrbitDefinitions.venus, planetScale * .4, "venus");
	addOrbitingPlanet(KMG.OrbitDefinitions.earth, planetScale * .4, "earth");
	addOrbitingPlanet(KMG.OrbitDefinitions.mars, planetScale * .25, "mars");
	addOrbitingPlanet(KMG.OrbitDefinitions.jupiter, planetScale, "jupiter");
	addOrbitingPlanet(KMG.OrbitDefinitions.saturn, planetScale, "saturn", true);
	addOrbitingPlanet(KMG.OrbitDefinitions.neptune, planetScale, "neptune");
	addOrbitingPlanet(KMG.OrbitDefinitions.uranus, planetScale, "uranus");
	addOrbitingPlanet(KMG.OrbitDefinitions.pluto, planetScale, "pluto");


	var belt = new KMG.BasicAsteroidBeltObject(context, {
		innerRadius : 100,
		outterRadius : 160,
		color : 0xC0C0C0,
		size : 0.7
	});
	addToPrimaryScene(belt);

	return true;
}
Credits
People and organizations that created and/or own some of the resources used in PlanetMaker.
- Planet Textures: Celestia, NASA
- Sun Texture: Runar Thorvaldsen
- Blue Marble NG, NASA Earth Observatory
- xPlanet Global Clouds
- Earth Altimetry Data: The GEBCO_08 Grid, version 20100927
- Mars Altimetry Data: Mars Orbiter Laser Altimeter (Mars Global Surveyor)
- Moon Altimetry Data: NASA Lunar Orbiter Laser Altimeter
- three.js JavaScript 3D Library
- Lens Flare: Public Domain Donation by hackcraft.de
- Background Images: Astronomy Picture of the Day
- Vegetation as Seen by Suomi NPP: NASA/NOAA
- Tycho Star Map: Caltech/JPL
- Hipparcos Star Map: Caltech/JPL
- Yale Bright Star Map: Caltech/JPL
- Cylindrical Maps of Venus: NASA/JPL
Changes
List of changes and modifications to PlanetMaker
- October 30, 2013:
- Rendering improvements
- Added scripting via SceneScript
- New User Guide
- New Postprocessing Effects
- New View Controls (like Google Earth)
- User Interface Improvements
- New Textures (Venus, etc...)
- July 29, 2013:
- Improved atmosphere
- New textures (A gas giant, banded clounds, a ring, & the Sun)
- Redesigned custom texture dialog
- Texture color modes (greyscale, inverted)
- Multiple moons
- Point light option (Main object is the one emitting light)
- Improved background stars
- Bug fixes and misc tweaks
- July 5, 2013: Fixed alphatest for ring opacity, Moon texture load defect
- July 3, 2013: Added ability to use a WebCam for textures
- June 27, 2013: Rolled out a new User Interface.
- June 21, 2013: HSL levels for surface and moon textures, some sample libnoise textures, and a gas giant texture.
- June 18, 2013: Fixed shadow bug
- June 17, 2013: Improved cloud shading
- June 12, 2013: Ability to adjust cloud shadow level (darkness), better city light adjustment, atmosphere improvements
- June 11, 2013: Adding a moon, planet flatting, misc fixes
- June 6, 2013: Ring opacity level
- June 5, 2013: Custom texture shading fix; Emissive lighting
- June 4, 2013: Ability to change local star texture and color
- June 3, 2013: Ability to switch between flat & spherical background images; Some extra error handling
- June 2, 2013: Added a local star
- May 31, 2013: Added ability to select or upload background images.
- May 30, 2013: Added ability to change the quantity of stars, enhanced "about" dialog.
- May 29, 2013: Added new surface textures for Earth & Jupiter